Introduction
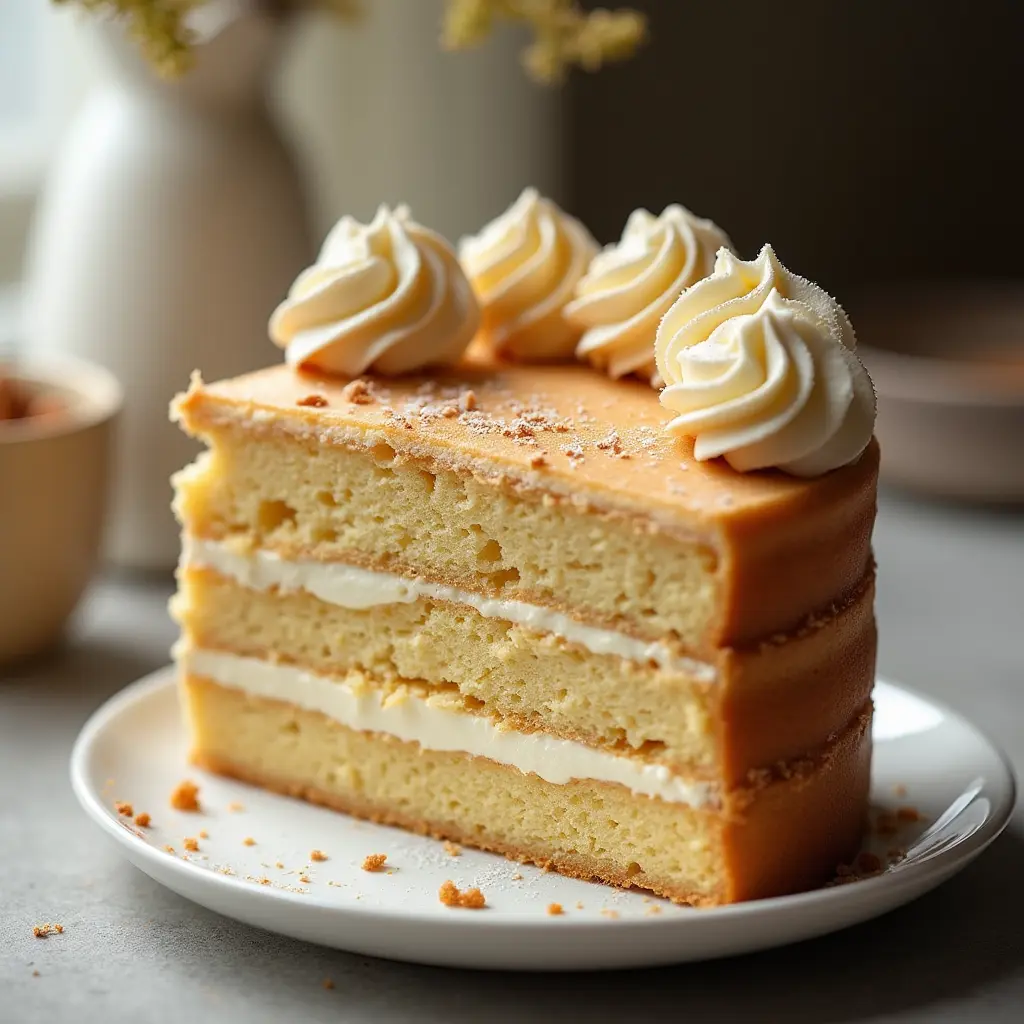
If you love classic Southern desserts, then vanilla wafer cake is a must-try! This rich, moist cake is unique because it’s made with crushed vanilla wafers instead of flour. The result? A dense yet tender texture with the perfect balance of buttery sweetness, coconut, and crunchy pecans.
In this guide, we’ll explore everything you need to know about vanilla wafer cake—from its history and key ingredients to a step-by-step recipe and exciting flavor variations. Plus, we’ll cover pro baking tips, common mistakes, and FAQs to help you achieve bakery-quality results at home.
Table of Contents
So, grab a box of vanilla wafers, and let’s get baking!
What Is Vanilla Wafer Cake?
A Unique Cake Made Without Flour
Unlike traditional cakes that rely on flour for structure, vanilla wafer cake gets its base from finely crushed vanilla wafers. This gives the cake a richer, more cookie-like texture while still maintaining a moist, soft crumb.
Why use vanilla wafers instead of flour?
- They provide a buttery, slightly caramelized flavor.
- Their fine texture creates a dense yet tender cake.
- They blend perfectly with eggs, butter, and sweet coconut.
The best part? You don’t need a mixer to make this cake—just a bowl, a spoon, and a little elbow grease!
The Origins and Popularity of Vanilla Wafer Cake
Vanilla wafer cake has been a Southern favorite for decades. Passed down through generations, this vintage dessert was often served at family gatherings, church suppers, and holiday celebrations.
So why has it remained so popular?
- It’s easy to make with just a few pantry staples.
- It has a delightfully chewy, nutty, and coconut-infused texture.
- The rich vanilla flavor pairs well with toppings like caramel glaze or whipped cream.
Over the years, bakers have added their own creative spins to this classic recipe, incorporating flavors like chocolate, caramel, and even fruit.
There are no direct internal linking opportunities for vanilla wafer cake on berecipesmaker.com, but if you’re interested in more delicious dessert recipes, check out their Sweet Potato Cheesecake for another rich and flavorful treat.
Key Ingredients for the Perfect Vanilla Wafer Cake
Choosing the Best Vanilla Wafers for the Recipe
The key to a perfect vanilla wafer cake is using high-quality vanilla wafers. Since they replace traditional flour, their texture and flavor directly impact the final cake.
What to look for in vanilla wafers:
- A rich, buttery flavor with real vanilla extract.
- A crisp texture that crushes easily into fine crumbs.
- No artificial aftertaste—you want pure vanilla goodness!
Popular choices include Nilla Wafers and store-brand versions, but homemade vanilla wafers can add an even deeper flavor.
The Role of Coconut and Pecans in Flavor and Texture
Two essential ingredients that make vanilla wafer cake extra special are shredded coconut and chopped pecans. These ingredients add sweetness, crunch, and depth to every bite.
- Coconut: Enhances moisture and provides a lightly sweet, chewy texture.
- Pecans: Add nuttiness and a subtle crunch that balances the softness of the cake.
If you’re not a fan of either, you can substitute walnuts, and almonds, or even omit the coconut for a smoother texture.
Other Essential Ingredients for Moisture and Structure
Aside from vanilla wafers, coconut, and pecans, here’s what you’ll need to make this cake rich and delicious:
- Eggs – Help bind the ingredients together and create structure.
- Butter – Adds moisture, tenderness, and a buttery flavor.
- Sugar – Balances flavors and enhances sweetness.
- Milk or Evaporated Milk – Keeps the cake soft and prevents dryness.
- Baking Powder – Since there’s no flour, this helps the cake rise slightly.
- Vanilla Extract – Boosts the vanilla flavor for a warm, aromatic taste.
With all the ingredients in place, let’s move on to Part 3, where we’ll go step by step through the baking process!
Step-by-Step Guide to Making Vanilla Wafer Cake

Preparing and Crushing the Vanilla Wafers
The first step to making vanilla wafer cake is turning the cookies into a fine crumb. Unlike traditional cake recipes that use flour, this recipe relies entirely on crushed wafers for structure.
How to Crush Vanilla Wafers Properly:
- Food Processor Method: Pulse wafers until finely ground.
- Rolling Pin Method: Place wafers in a sealed plastic bag and crush with a rolling pin.
- Hand-Crushing Method: Break wafers into small pieces and press with a spoon.
Make sure the crumbs are fine and even—this ensures a smooth batter without lumps.
Mixing the Wet and Dry Ingredients for a Perfect Batter
Once your vanilla wafers are crushed, it’s time to assemble the batter. Follow these steps for the best results:
- Cream the butter and sugar until light and fluffy.
- Beat in the eggs one at a time, mixing well after each.
- Stir in the crushed vanilla wafers, followed by the coconut and pecans.
- Gradually add the milk, mixing just until combined.
- Fold in vanilla extract and baking powder to complete the batter.
The batter should be thick but pourable, similar to a dense pound cake.
Baking Tips for a Golden, Moist Cake
Getting the perfect moist and golden cake requires proper baking techniques.
- Preheat the oven to 325°F (163°C) – A lower temperature prevents the cake from drying out.
- Use a well-greased Bundt pan – This ensures an even bake and easy release.
- Bake for 50-60 minutes – Check for doneness by inserting a toothpick; it should come out clean but slightly moist.
- Cover with foil if browning too fast – This keeps the top from getting too dark.
Cooling and Serving Suggestions for the Best Taste
Once baked, it’s important to cool the cake properly before serving.
- Let it rest in the pan for 10-15 minutes before inverting onto a wire rack.
- Allow it to cool completely—this helps the flavors set.
- Dust with powdered sugar, drizzle caramel or serve with whipped cream for an extra treat.
Now that your vanilla wafer cake is baked to perfection, let’s move on to Part 4, where we’ll explore delicious variations you can try! 😊
5 Delicious Variations of Vanilla Wafer Cake
While the classic vanilla wafer cake is already delicious, why not experiment with some exciting variations? Whether you love chocolate, caramel, or fruit, these five creative twists will take your cake to the next level!
1. Chocolate Chip Vanilla Wafer Cake for a Sweet Twist
Chocolate lovers, this one’s for you! Adding chocolate chips to your vanilla wafer cake creates a delicious contrast between the sweet vanilla and rich chocolate.
How to make it:
- Stir 1 cup of semi-sweet or milk chocolate chips into the batter before baking.
- For extra decadence, drizzle melted chocolate over the cooled cake.
- Pair with a scoop of vanilla ice cream for an indulgent dessert!
2. Caramel Pecan Vanilla Wafer Cake for a Rich Flavor
Caramel and pecans are a match made in dessert heaven. This variation adds a sweet, nutty crunch to the classic recipe.
How to make it:
- Swirl ½ cup of caramel sauce into the batter before baking.
- Add extra chopped pecans on top for a toasty crunch.
- Drizzle with warm caramel sauce before serving for an irresistible finish.
For even more caramel goodness, check out this Caramel Cheesecake Recipe!
3. Gluten-Free Vanilla Wafer Cake for Dietary Needs
Need a gluten-free option? This variation is just as delicious but swaps out traditional vanilla wafers for a gluten-free alternative.
How to make it:
- Use gluten-free vanilla wafer cookies instead of regular ones.
- Make sure your baking powder and other ingredients are certified gluten-free.
- The result? A moist, flavorful cake that everyone can enjoy!
4. Fruity Vanilla Wafer Cake with Pineapple and Coconut
If you love tropical flavors, this fruity twist is a must-try. The combination of pineapple and coconut adds a bright, refreshing taste.
How to make it:
- Mix 1 cup of crushed pineapple (drained) into the batter.
- Increase the shredded coconut to 1½ cups for extra texture.
- Serve with whipped cream and toasted coconut flakes for a tropical touch!
5. Holiday-themed vanilla Wafer Cake for Festive Occasions
Why not turn your vanilla wafer cake into a holiday dessert? This variation adds seasonal spices and toppings to match the occasion.
Ideas for different holidays:
- Christmas: Add cinnamon, nutmeg, and a dusting of powdered sugar.
- Thanksgiving: Swirl in pumpkin puree for a fall-inspired treat.
- Easter: Top with pastel sprinkles and a cream cheese glaze.
No matter the season, this cake will be a hit at any family gathering or celebration!
Pro Tips for a Perfectly Baked Vanilla Wafer Cake
Want your vanilla wafer cake to turn out soft, moist, and flavorful every time? Follow these pro-baking tips for the best results!
How to Prevent Dryness and Maintain Moisture
Nobody likes a dry cake! To keep your vanilla wafer cake moist and tender, try these tricks:
- Use room-temperature ingredients to help them blend smoothly.
- Do not overmix the batter—overmixing can make the cake dense.
- Add a splash of milk or buttermilk if the batter seems too thick.
Achieving the Perfect Balance of Crunchy and Soft Textures
The best vanilla wafer cake has a crispy golden crust with a soft, moist interior. Here’s how to get that perfect texture:
- Bake at 325°F (163°C) for a slower, more even bake.
- Use a Bundt pan for a crispier crust and beautiful shape.
- Let the cake rest for 10-15 minutes before removing it from the pan.
Storage and Freezing Tips for Long-Lasting Freshness
Want to enjoy your cake later? Here’s how to store it properly:
- Room temperature: Keep in an airtight container for up to 3 days.
- Refrigerator: Store in the fridge for up to a week—just bring it to room temp before serving.
- Freezer: Wrap slices in plastic wrap and freeze for up to 3 months. Thaw at room temperature before enjoying.
With these expert tips, you’ll have a vanilla wafer cake that’s moist, flavorful, and bakery-worthy every time!
Up next, in Part 6, we’ll go over common mistakes and how to fix them so you can avoid baking disasters! 🍰😊
Common Mistakes and How to Fix Them
Even experienced bakers can run into trouble when making vanilla wafer cake. Whether it’s a dense texture, dryness, or uneven baking, these common mistakes are easy to fix. Let’s go over some baking mishaps and how to prevent them.
Why Did My Cake Turn Out Too Dense or Dry?
A perfect vanilla wafer cake should be moist, tender, and flavorful. If yours turns out too dense or dry, here’s why:
How to Fix It:
- Overmixing the batter – Mixing too much can create a tough, heavy cake. Stir just until the ingredients are combined.
- Not enough moisture – If the batter seems too thick, add a splash of milk or an extra egg.
- Baking at too high a temperature – A lower temp, around 325°F (163°C), allows the cake to bake evenly without drying out.
Preventing Overbaking and Keeping the Cake Tender
Overbaking can make vanilla wafer cake too firm. If your cake is hard or crumbly, the baking time or method may need adjustment.
How to Fix It:
- Check for doneness early – Use a toothpick around 45-50 minutes into baking. If it comes out with a few moist crumbs, it’s ready!
- Use a foil tent – If the top browns too quickly, loosely cover it with foil in the last 15 minutes.
- Let it cool in the pan – Removing the cake too soon can make it dry out faster.
How to Properly Crush Vanilla Wafers for the Best Texture
Since vanilla wafer cake uses cookie crumbs instead of flour, properly crushing the wafers ensures a smooth, well-balanced texture.
How to Fix It:
- Use a food processor – Pulse until the crumbs resemble fine breadcrumbs.
- Avoid large chunks – Hand-crushing may leave big pieces, leading to uneven texture.
- Measure after crushing – Always crush first, then measure, to get the right amount.
Now that we’ve covered common mistakes, let’s move on to Part 7, where we’ll answer some frequently asked questions about vanilla wafer cake!
Frequently Asked Questions (FAQ)
Can I Make Vanilla Wafer Cake Without Nuts?
Yes! If you’re allergic to nuts or prefer a smoother texture, simply omit the pecans. You can replace them with extra coconut, chocolate chips, or leave them out entirely.
How Do I Store Leftover Vanilla Wafer Cake?
For the best freshness:
- Store at room temperature in an airtight container for up to 3 days.
- Refrigerate for up to a week to keep it moist.
- Freeze slices individually for up to 3 months. Thaw at room temperature before serving.
Can I Use Different Brands of Vanilla Wafers?
Absolutely! While Nilla Wafers are the most popular, you can use any vanilla wafer cookie. Just make sure they have a buttery, rich flavor to maintain the classic taste.
What’s the Best Way to Serve Vanilla Wafer Cake?
This cake is delicious on its own, but you can make it even better with:
- A dusting of powdered sugar for a simple touch.
- Warm caramel or chocolate drizzle for extra indulgence.
- Whipped cream and fresh berries for a refreshing twist.
Conclusion
Making the perfect vanilla wafer cake is easier than you think! With its rich, buttery texture, sweet coconut and pecans, and moist crumb, this classic dessert is a true Southern favorite. Whether you stick with the traditional recipe or try one of the delicious variations, this cake is sure to impress family and friends.
By following the right techniques, avoiding common mistakes, and using high-quality ingredients, you can achieve a bakery-style vanilla wafer cake every time. And with proper storage tips, you can enjoy this delightful treat for days!
Ready to learn more about baking and classic desserts? Check out these helpful resources:
- Cake – Wikipedia – Learn about the history and different types of cakes from around the world.
- Baking – Wikipedia – Understand the science behind baking and how ingredients interact.
- Vanilla – Wikipedia – Discover the origins and importance of vanilla in baking.
- Shortbread – Wikipedia – Explore another delicious cookie-based dessert similar to vanilla wafers.
Now it’s time to grab your ingredients, fire up the oven, and enjoy a slice of homemade vanilla wafer cake! Happy baking! 🍰😊